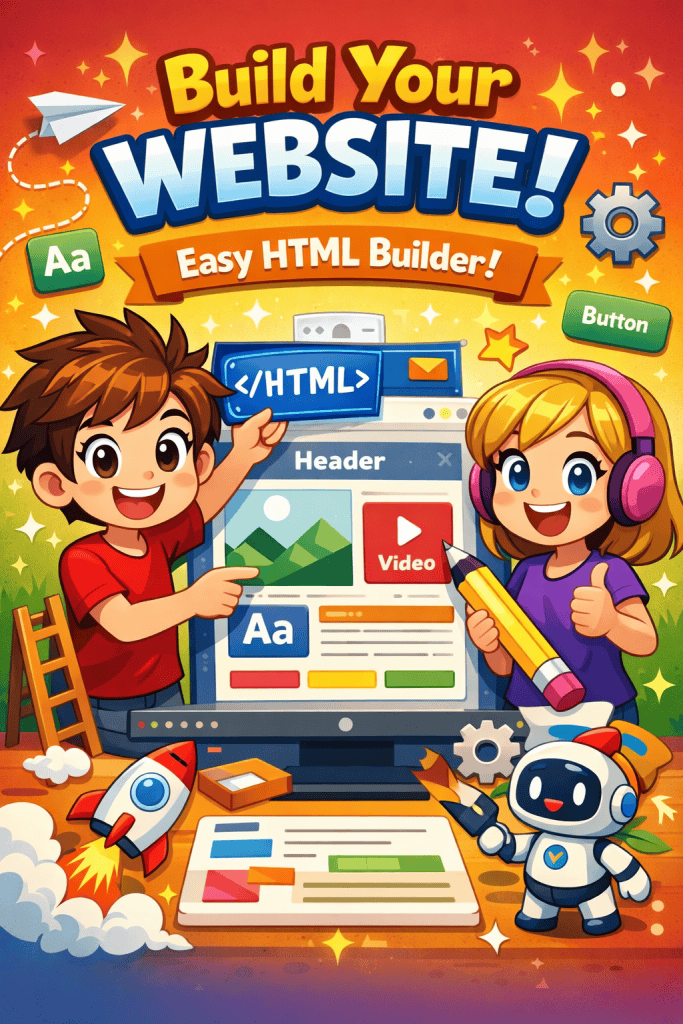
Now You Can Easily Build HTML Websites!
Build Websites Fast with the Ultimate HTML Designer
Stop struggling with confusing code and start building your own websites today. The SMB HTML Designer is a simple but powerful tool made to help you create professional pages quickly and easily.
Create with Confidence
Build a high-quality website in just a few seconds. Our editor lets you add important parts to your page with just one click. You can easily add:
Our “no-break” technology keeps your buttons and checkboxes perfectly lined up on the same line, so your site always looks neat and tidy.
Professional Tools Made Simple
You don’t need to be an expert to get great results. This designer gives you everything you need to succeed:
- Table Generator: Create clear data tables by just choosing how many rows and columns you want.
- Contact Forms: Add a professional form so people can send you messages directly.
- Navigation Menus: Give your site a clean menu at the top so users can find their way around.
- Local Images: Easily add photos directly from your own computer.
- and lots more…
Download our SMB HTML Designer today and start building your website.
Smart and Easy to Use
The app is designed to fit your workflow perfectly. It remembers exactly where you left the window on your screen and how big it was. You can open your old HTML files, make changes, and save them in an instant. If you ever get stuck, there is a built-in link to the best HTML learning resources online.
Whether you are just starting or have been coding for a while, this tool helps you get the job done without the headache.
SMB HTML Designer Features
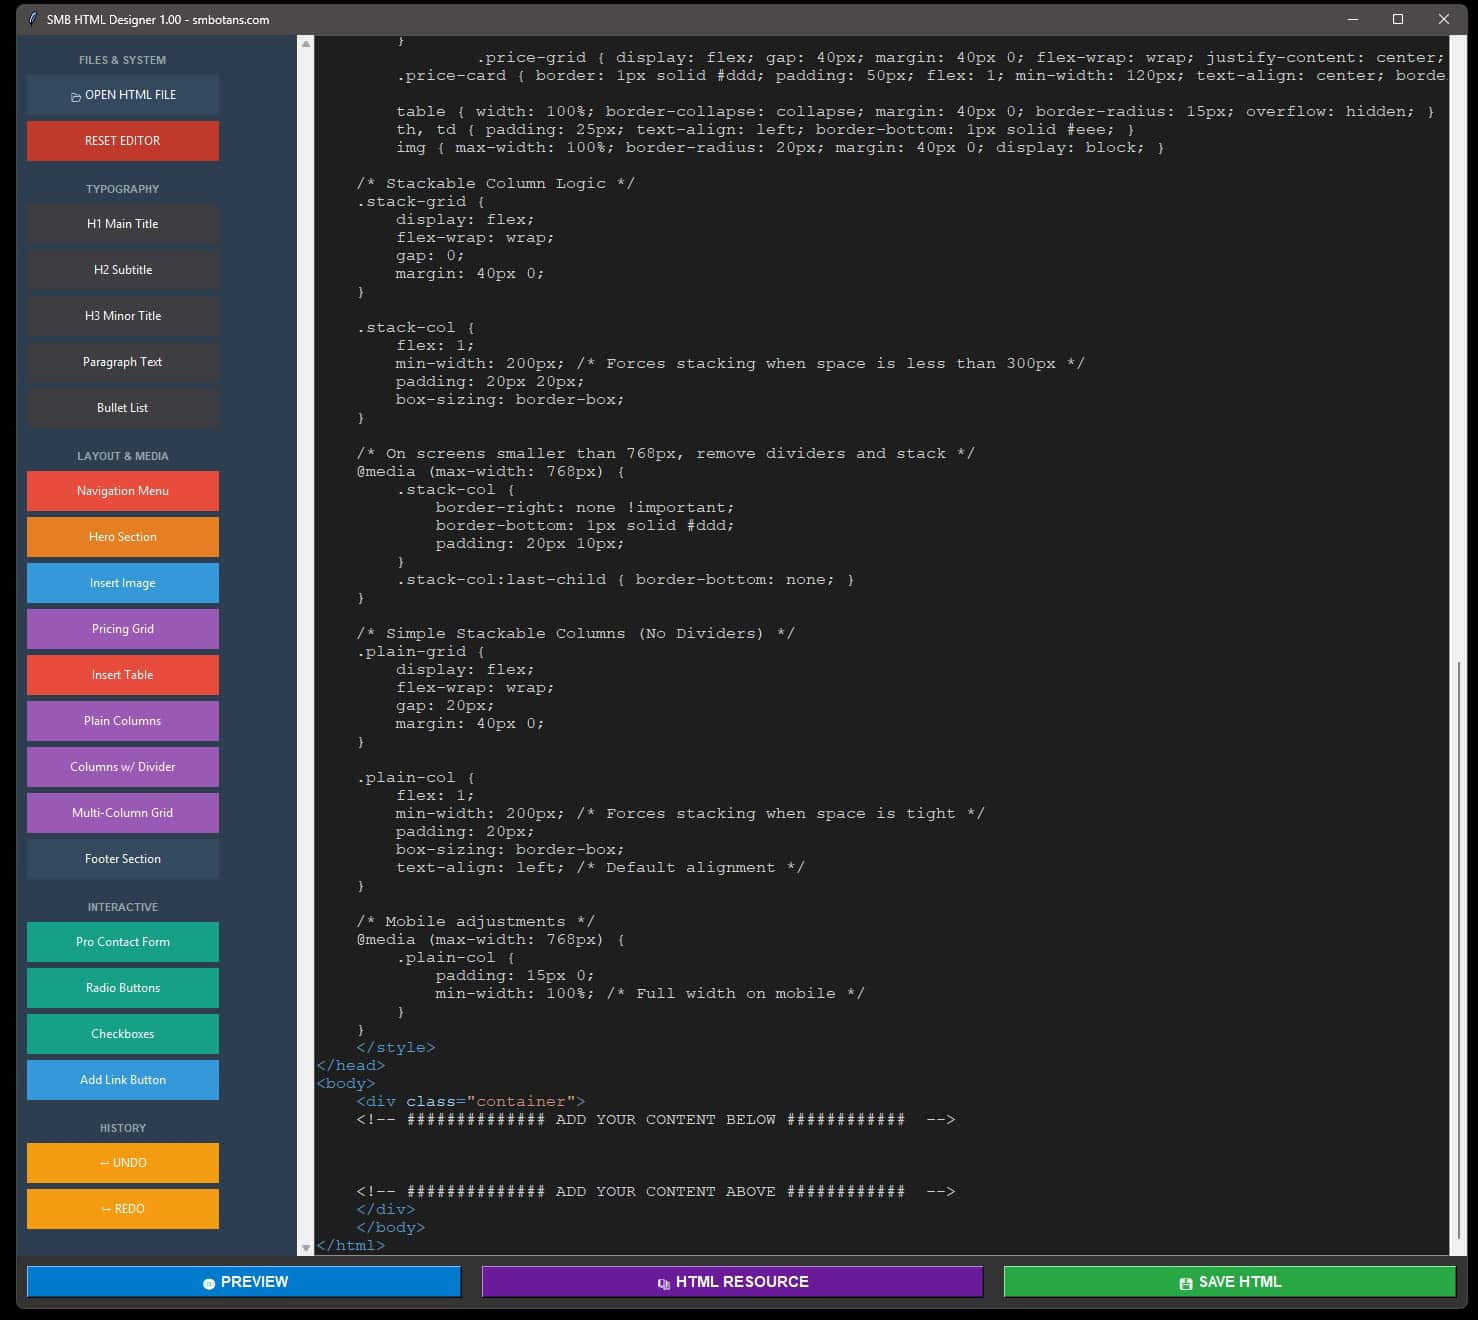
System & Workspace Management
- Window Memory: The application automatically remembers and restores its exact size and position on your screen every time you launch it.
- Smart Grid Layout: The interface features an edge-to-edge design where the code editor expands to fill all available horizontal and vertical space.
- File Handling: Includes a dedicated button to open existing HTML files and a secure save function for your new designs.
- Editor Controls: Built-in History category with functional Undo and Redo buttons, plus a Reset Editor option to restore the original template.
- Syntax Highlighting: Real-time color-coding for tags, attributes, strings, and comments to make code reading easy.
Layout & Typography Tools
- Full-Scale Container: Generates a modern, wide-screen webpage using a 1400px maximum width container with deep padding for a luxurious feel.
- Typography Suite: One-click buttons to inject professionally styled H1, H2, and H3 titles, as well as formatted paragraphs and bullet lists.
- Navigation Menu: A customizable, sticky top menu that stays at the top of the page during scrolling, featuring a site logo and menu links.
- Footer Component: Adds a professional bottom section with copyright information and links for privacy policies or terms of service.
- Hero Sections: Creates large, impactful welcome areas with centered titles and subheadings.
Interactive & Media Features
- Email-Ready Pro Form: A high-end, 850px-wide contact form with specialized CSS, shadow effects, and built-in “Formspree” integration to send emails directly.
- Bulletproof Alignment: Specialized flexbox rules ensure that Radio Buttons and Checkboxes always stay on the same line as their text.
- Dynamic Pricing Grid: A generator that asks for a column count and builds a responsive pricing table with hover effects.
- Table Generator: A smart tool that builds complex HTML tables based on your chosen number of rows and columns.
- Media Support: Includes a local image browser to select photos from your hard drive and a favicon tool to add an icon to your browser tab.
Advanced Editing & Resources
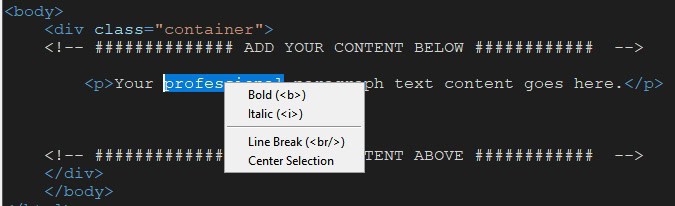
- Context Menu: A right-click menu providing quick access to Bold, Italic, Underline, Line Breaks, and Center Alignment.
- Paragraph Spacing: A specialized formatting tool that adds consistent vertical “breathing room” between sections of your page.
- Direct Browser Preview: Instantly launches your current code in your default web browser to see the live result.
- MDN Resource Link: A dedicated footer button that connects you directly to the world’s best HTML documentation for learning.
Quick ”How to Use” Details
This Step-by-Step User Guide will help you master our SMB HTML Designer to create your very own websites with ease.
Phase 1: Setting Up Your Workspace
- Window Memory: Open the app and resize or move the window to your preferred location; it will automatically remember this position for your next session.
- Editor Interface: The dark area in the center is your code editor, where all HTML and CSS will be generated in real-time.
- Sidebar Navigation: Use the categories on the left (Typography, Layout, Interactive) to find the components you need.
Phase 2: Building Your Page Structure
- Navigation: Click Navigation Menu and enter your site name to add a professional header to the top of the page.
- Hero Section: Use the Hero Section button to create a high-impact welcome area for your visitors.
- Wide Layout: The app automatically uses a 1200px wide container, ensuring your site looks great on modern monitors.
Phase 3: Adding Content and Interactivity
- Typography: Click H1, H2, or H3 to add titles, then use the Paragraph button to add your main text.
- Professional Forms: Click Pro Contact Form to insert an email-ready form that includes shadow effects and clean labels.
- Pricing & Tables: Use the Pricing Grid or Insert Table buttons; the app will ask you exactly how many columns or rows you want to generate.
- Aligning Options: When adding Radio Buttons or Checkboxes, the app uses “bulletproof” CSS to keep the circles and labels perfectly aligned on one line.
Phase 4: Media and Fine-Tuning
- Local Images: Use Insert Image to select a photo directly from your computer’s hard drive.
- Tab Icons: Use the Favicon Icon button to select a small image that will appear in the browser’s tab.
- Right-Click Power: Highlight any text in the editor and right-click to quickly apply Bold, Italic, or Paragraph Spacing.
Phase 5: Previewing and Saving
- Browser Preview: Click the blue PREVIEW button at the bottom to see your website exactly as it will appear online.
- Research: If you need help with a specific tag, click HTML RESOURCE to open the MDN documentation.
- Save Your Work: Click SAVE HTML to name your file and save it to your computer.
- Open Existing Projects: Use OPEN HTML FILE at the top of the sidebar to load an old project back into the editor.
Hints you Need to Know
- The very first thing you need to do is put your cursor, by clicking there, between ADD YOUR CONTENT BELOW and ADD YOUR CONTENT ABOVE. Otherwise, your web page will not render properly.
- If you are going to use a NAVIGATION menu, add this item first.
- If you are going to add a FOOTER, add this item last.
- Whenever you add an item, it will be added where your cursor is in the code black space on the right of the GUI. This means, that you can add buttons and/or images inside tables, for example.
- If you want to create a separation between lines, add the following code at a new line:
- <p></p>: this works like ‘create a new blank paragraph ie. it adds space above and below.
- <br />: this works like ‘create a new empty line ie. no empty space above and below.
- If you want to add colour, change font, change font size, and so on… you will need to edit the css code in the code black section of the GUI on the right.
- The app does not correct bad css or html code, so make sure you are always using the right code if you add it by hand, or alter the displayed code.
Making the Contact Form Work
Follow these three easy steps to start receiving messages from your visitors directly in your inbox.
Step 1: Get Your Unique Form Link
Visit Formspree.io and create a free account. Once you are logged in, create a new “Form” and copy the Unique Endpoint URL they provide (it will look like https://formspree.io/f/xyza123).
Step 2: Update Your Code
In your website editor, look for the contact form section. Find the line that starts with <form action=”…”>. Replace the placeholder text with your new unique link from Step 1.
Step 3: Test and Go Live
Save your changes and preview your site. Fill out the form yourself and click “Send Message.” Check your email—you should receive a notification immediately!
Why use this method?
- No Server Needed: You don’t need to learn complex “backend” coding or rent a special server.
- Spam Protection: Our form includes a “Gotcha” field that automatically blocks robots from sending you junk mail.
- Instant Delivery: Messages are delivered to your email address the moment a visitor hits send.
Quick Tips for Success
- Check Spam: If you don’t see your test email, check your “Junk” folder and mark it as “Not Spam.”
- Name Fields: Ensure your input tags have: name=”email”, and name=”message” attributes so Formspree knows which data is which.
- One-Time Setup: You only need to do this once. After it is set up, it will work forever!
Would you like me to generate a “Success Page” template? This is a simple page that tells your visitors “Thank you, your message has been sent!” after they submit the form.
Other No-Frills Free Software
We have lots of other free no-frills software, click on the button on the right to view them all.
SMB HTML Designer Versions
1.00 Initial release.